I'm Amy, a stay-at-home mom by day and a crafter by night. After a day of chasing my kids around the house, I escape to my craft room for a few hours of creating while they sleep. Thanks for joining me in my little corner of the crafting world!
Showing posts with label Elegant Eggplant. Show all posts

Friday, March 1, 2013

CASEd Squares for the Featured Stamper Challenge

Yippee, it's Friday!  We are finally seeing some ground through the (slowly) melting snow here.  It's a bit cloudy and dreary, but I'm just grateful I'm not snowed in anymore!

This week's Featured Stamper challenge at Splitcoast Stampers asks us to CASE (Copy and Share Everything) a card from the gallery of Andrea Hayes.  Andrea has so many beautiful CAS (Clean and Simple) cards that it was hard to choose just one, and I have found several I hope to use for inspiration in the future.  

I finally decided to CASE this beauty: Celebrate

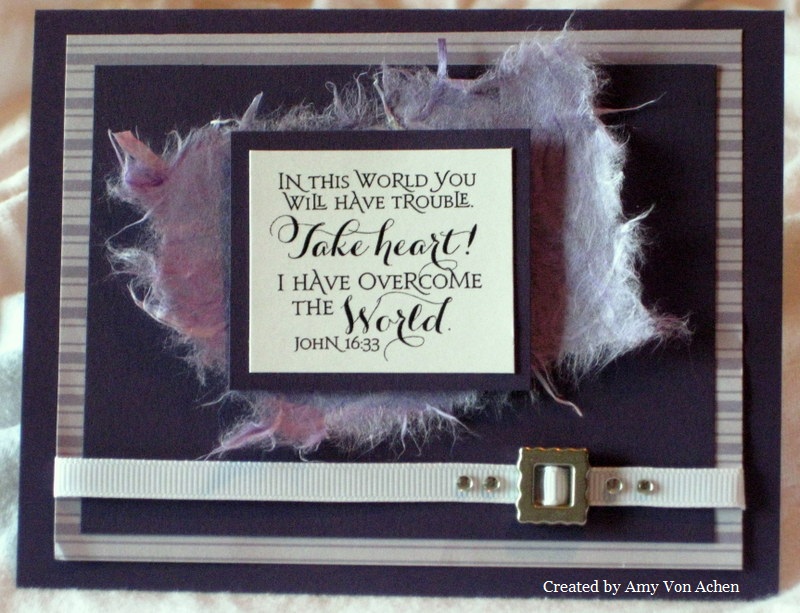
Oh, how I love Elegant Eggplant!  It is one of my favorite Stampin' Up! colors.  I have used it here on both cards for my solid card stock and my ink.  Instead of using two patterned papers, I used one patterned paper and one embossed card stock. 

I had so much fun with her design that I decided to make two different cards.  The first is a 5 x 5 square card, or maybe just a bit smaller, as I got a little overzealous with my paper trimmer!


(I have to apologize for the picture quality.  The lack of natural light on these wintry, dreary days is really challenging my minimal photography skills!)


I started by adhering the patterned paper to a heavy white card stock base.  I used my Big Shot to emboss a piece of Elegant Eggplant card stock, then cut it into a triangle and adhered it to the patterned paper.  I stamped my sentiment using Elegant Eggplant ink on Whisper White card stock, then die cut it.  I applied Lovely Lilac chalk to the circle and attached it to the card front using Stampin' Dimensionals.  Finally, I added some Lavender Lace liquid pearls...and they looked really nice until I dropped the card while the pearls were still wet!  I was able to repair the damage, but please don't look too closely at those pearls!!  This card also qualifies for the Ways to Use It Challenge at Splitcoast Stampers this week, where we are celebrating the eighth anniversary of the challenge.  How fun!


The second card is smaller at 4 x 4 inches:


For this one, I used the same patterned paper and embossed card stock, but I reversed them.  I used Elegant Eggplant card stock for my base and ran the front through my Big Shot with an embossing folder, then attached a triangle of patterned paper.  (Because the patterned paper on the top is so thin, I had to add a lightweight white card stock layer behind it so the embossed dots didn't show through.)  I stamped the image on Whisper White card stock using Elegant Eggplant ink.  I die cut the image, inked the edges with Lulu Lavender and attached it using Stampin' Dimensionals. Since I did not use a white card base, I added a white liner to the inside of the card. 

I hope you have a wonderful weekend!  Thanks so much for stopping by!

Products Used: 
Stamps: "Feel Better Soon"/Verve (first card); "Happiest Birthday Wishes"/Stampin' Up! (second card)
Ink: Elegant Eggplant Classic Dye Ink (Stampin' Up!); Memento Lulu Lavender (Tsukineko)
Paper: Purple Friendship (Crafts, Etc!); Elegant Eggplant, Whisper White card stock (Stampin' Up!); 
Neenah Classic Crest Solar White 110 lb. card stock (base for first card) 
Tools and Accessories: Nestabilities Standard Circles Large (Spellbinders); Swiss Dots embossing folder (Cuttlebug); Lavender Lace Liquid Pearls (Ranger); Stampin' Pastels, Stampin' Dimensionals (Stampin' Up!) 

Thursday, February 28, 2013

How Many Circles Do You See?

Happy Thursday!  Wow, the past week has just flown right by and I've had very little crafting time.  We've had two major snowstorms which have resulted in many, many snow days at my house.  I figured snow days would mean plenty of crafting time, but I've hardly had a moment to step foot in my craft room!  My kids have had a blast playing in the snow and it's been fun to have the whole family home together, but I'm glad the snow is starting to melt and we're getting back to our routine again.

I created this card for three challenges.  The Try a New Technique challenge at Splitcoast Stampers this week asks us to use circles on a card.  The Teapot Tuesday challenge (also at Splitcoast Stampers) asked us to use circles while drawing inspiration from this week's tea set.  And for the first time ever, I am entering the weekly challenge (Week 61) at Pixie's Crafty Workshop because I used snippets of scraps from my craft drawer for several pieces on this card.  Those girls with their snippets are such a hoot, and I'm so glad I get to join them this week!

Here's my card:


Another view, which hopefully shows the inlaid embossing better:


This card uses one of my favorite techniques, the inlaid embossing technique.  I saw a card using the technique with solid-colored circles on Pinterest, so I drew my inspiration for my background circles from that card, which can be seen HERE.  I love it when I can CASE (Copy and Share Everything) a card or idea and change it a bit to create something of my own!

I started by die cutting several circles out of snippets of paper from one of my favorite matstacks.  I adhered them to a piece of pale purple card stock, then ran the entire panel through my Big Shot and the Square Lattice embossing folder.  I embossed a piece of shimmery pale purple paper with the Spots and Dots embossing folder, then adhered that over the circles.  I attached the entire piece to an Elegant Eggplant card base.  I stamped the verse in Elegant Eggplant on Natural White card stock, then die cut it and attached it to a die cut piece of Elegant Eggplant.  I attached this panel using Stampin' Dimensionals.  I added several sizes of pearls to the circles on the shimmery pale purple panel for a final "circles" touch.

I've lost count of how many circles are on this card!  Too many?  I hope not!  

I have a couple of square cards that I'm finishing up today.  I'm planning to post them tomorrow, so I hope you'll visit again soon.  Thanks for stopping by!

Products Used:
Stamp: Scripture Series 3 (Our Daily Bread Designs)
Ink: Elegant Eggplant (Stampin' Up!)
Paper: Latte Matstack (DCWV); Elegant Eggplant card stock (Stampin' Up!); Classic Crest Natural White (Neenah); shimmery pale purple paper (from a scrap bag at cutcardstock.com); 
pale purple card stock (unknown)
Tools and Accessories: Nestabilities Standard Circles Large (Spellbinders); Square Lattice embossing folder (Stampin' Up!); Nestabilities Labels One (Spellbinders); Spots and Dots embossing folder (Provo Craft); 
pearls (KaiserCraft)

Thursday, February 7, 2013

Monochromatic Thinking of You

Happy Thursday!  It sure feels good to be getting this close to the weekend.  We've been awfully busy at my house lately, and I could really use some down time!

This week's Clean and Simple (CAS) challenge at Splitcoast Stampers is a "limited supplies" challenge.  We are challenged to use only monochromatic colors (and one neutral, if we wish).  I chose to use shades of purple, and I added some tiny rhinestones in place of my neutral.  Since it's a CAS challenge, we are supposed to have lots of open space and use few very layers and embellishments.  

Here's my card:
(There's a tiny smudge on the "T", but it's not really noticeable in person.)

I started by stamping my image in Lovely Lilac on Almost Amethyst card stock.  I covered the image in clear embossing powder and heat set it.  I stamped my sentiment in Elegant Eggplant and attached the stamped panel to an Elegant Eggplant card base.  I added tiny rhinestones to the centers of the flowers for just a hint of bling.  Quick and easy!

I love the simplicity and versatility of a monochromatic CAS card.  Elegant Eggplant is one of my favorite Stampin' Up! colors, and sometimes it's nice to use something other than red and white at this time of year.  I'm in the middle of making Valentine's Day treat packages for my son's class, so it was nice to add a little purple to my crafting time this week!

I hope you're having a fun, crafty week.  Thanks for stopping by!  

Products Used:
Image Stamp: Gina K. Designs
Sentiment Stamp: Sincere Salutations (Stampin' Up!)
Paper: Almost Amethyst, Elegant Eggplant (Stampin' Up!)
Ink: Lovely Lilac Craft Ink, Elegant Eggplant Classic Ink (Stampin' Up!)
Accessories: Clear Embossing Powder (Mrs. O'Leary's); tiny rhinestones (Offray)

Tuesday, November 20, 2012

Simple Sympathy Cards

Happy Tuesday!  We're a bit under the weather at my house right now (in the midst of Thanksgiving preparations...how unfair is that?!) so I'm spending more time wiping noses and soothing unhappy children than I am crafting.  However, I needed to make a sympathy card this week, so I squeezed in a little stamping time while the kids were sleeping.

I am going to show you a few different versions of this clean and simple, quick sympathy card.  I'm using a stamp set you've seen me use before.  It's not my only sympathy set, but it's definitely my favorite. 

Here's my first card:

Insomniac Stamper's Simple Sympathy in Purple

For this card, I started with a panel of Whisper White card stock and applied Memento Lulu Lavender using the "direct to paper" technique.  With this method, you apply your stamp pad directly to the paper.  I used a small dewdrop pad and I find this works better (for me) than using the larger pads.  To avoid getting ink lines from the edge of the pad (or depositing too much ink on the card edges) I started my ink pad off the panel (on the scratch paper underneath) and began swirling the ink on the scratch paper, then moved inward onto the card so the "impact" point was not on the card itself.  I sometimes use chalks or sponging to create this effect, but I think these Memento dewdrop pads work really well for this background.  After I achieved the depth of color I wanted, I used an old towel to rub off any excess ink.  I then stamped my image and sentiment in Elegant Eggplant, and attached the panel to an Elegant Eggplant card base.  This card took less than 5 minutes to make. 

I wanted to try other color options while building my supply of sympathy cards (I seem to need too many of these lately).  This time I used Memento New Sprout for the background, using the same technique as above.  I like the combination of Elegant Eggplant and New Sprout:


I'm also challenging myself to make more one-layer cards, so I tried making a card without the Elegant Eggplant card base.  I think this works nicely as another option:


You can easily use these techniques to make sympathy cards as well as cards for other occasions and with other stamp sets.  I love having go-to card ideas for those last-minute cards, and any card that can be made in 5 minutes or less is a winner in my book!

One tip: Although dye ink should be fast-drying, I had a few issues with Elegant Eggplant smudging this time (so there are a few card fronts in my recycle bin now!).  I'm not sure why it wasn't drying immediately this time, but a quick fix is to use your heat tool for a few seconds to set the ink before moving on to the next step. 

Thanks for visiting! 

Products Used:

Stamps: Close as a Memory (Stampin' Up!)
Ink: Memento Lulu Lavender and Memento New Sprout (Tsukineko);
Elegant Eggplant Classic Dye Ink (Stampin' Up!)
Paper: Whisper White and Elegant Eggplant card stock (Stampin' Up!)
Technique: Direct to Paper

Thursday, October 18, 2012

Acrylic Block Collage, Take 2

I just couldn't stop playing with this fun technique this week!  This is a continuation of the technique I posted yesterday.  If you missed it, HERE is yesterday's post.  You can also see the original challenge and technique instuctions on Splitcoast Stampers HERE.

This time I wanted to use softer, more subtle colors, so I decided to use purples and pinks.  My first card is a very Clean and Simple sympathy card:


The background was created by inking my acrylic block with several shades of pink and purple, then spritzing it with water and stamping it on the white card stock. After the background dried, I inked a small heart stamp and stamped it randomly over the background. Then I stamped my flowers and sentiment. Quick and easy!

I have mixed feelings about this next card.  I used the same basic background as the card above, but this time I inked stem images all over the area. I like the effect but feel it might just be a little too "busy" with all those stems! 


This technique just has so many possibilities.  I still want to make a card with separate color blocks, so I need to add that one to my list.  But I have a couple of other challenges waiting on my craft desk, so I am off to work on those now!

Thanks for stopping by!

Products Used:
 
Paper: Whisper White card stock (Stampin' Up!)
Inks on background: Various shades of pink and purple markers and dye ink pads
Inks on sentiment and flowers: Elegant Eggplant (Stampin' Up!)
Sentiment and flower stamps: "Close as a Memory" (Stampin' Up!)
Tools: Acrylic block, water mister

Monday, October 1, 2012

Go Ahead, Copy Me!

You know how in school you're not allowed to copy someone else's work?  Well, in cardmaking circles, copying is form of flattery!  There's even an acronym for it: CASE, which stands for Copy and Share Everything.  This doesn't mean you duplicate the card exactly; instead, you use the existing card to springboard your own creativity.  You can replicate the colors, the sentiment, the design, etc., but put your own twist on them and change up a few elements.

Today's card is a CASE for a Splitcoast Stampers challenge.  Once a week, a Featured Stamper is chosen, and those who play in the challenge pick one of the Featured Stamper's cards to CASE.  The original card can be seen here.  This is my CASE of that card:


I kept the basic layout and design of the original card.  I chose a different sentiment from the same set used on the original card.  I also changed the colors, the image and the number of layers. 

I started by sponging several hues of purple and lavender chalks on a panel of white card stock.  I sponged the chalk by rubbing a piece of craft sponge (you could also use a sponge dauber) in my chalk, then rubbing it on the card stock in a circular motion.  I started with my palest lavender shade and gradually added more color, using progressively darker shades of purple.  I stamped my image in White Craft Ink, then covered the ink in white embossing powder and Stampin' Up! Glassy Glaze embossing powder.  (I added the Glassy Glaze because I don't like the way my white embossing powder sets on its own.  If you have a better-quality white EP, you would not need to add Glassy Glaze).  I heat embossed the image, then stamped "Happy Birthday" in Elegant Eggplant Classic Ink.  I adhered this panel to an Elegant Eggplant card base.  In the picture the card base almost looks black, but in reality it's a very deep and rich purple.  It's one of my favorite card stock colors!

This card offers endless possibilities for colors, images and sentiments.  And if you've never tried sponging chalk, I hope you'll give it a try!  Here's a tip: A white eraser can fix most chalk mistakes, which makes it a great medium for perfectionists! 

Here's a list of the Stampin' Up! products I used:

Stampin' Pastels (chalks)
Glassy Glaze
Elegant Eggplant card stock and dye ink
Sentiment - "Elegant Greetings"
Image - "Close as a Memory"
 
 
Thanks for stopping by!  Happy Stamping!

Friday, September 14, 2012

Scripture Inspiration

Today I want to share a couple of cards I made with stamps from the new Scripture Series 3 set from Our Daily Bread Designs.  This set is very special to me as I contributed one of the verses for it!  The verse stamped on this first card was my contribution, and as a special treat, I was able to make this card for the September release on their blog:
 

This verse has been one of my favorites since I was a teenager and always brings me comfort in the midst of difficulty.  I highlighted it with mulberry paper, which is one of my favorite papers to use. 
 
I love the combination of purple, silver and white in my cards. In fact, I liked it so much that I made another card using the same color combo and a different verse from the same collection:


I hope these verses inspire your day the way they have inspired mine!  Thanks for visiting!