I'm Amy, a stay-at-home mom by day and a crafter by night. After a day of chasing my kids around the house, I escape to my craft room for a few hours of creating while they sleep. Thanks for joining me in my little corner of the crafting world!
Showing posts with label Rose Red. Show all posts

Tuesday, February 5, 2013

Mixed Media Valentine

Happy Tuesday!  After a few days away from crafting while I nursed a migraine (oh, those evil weather changes) and rushed my way through a busy weekend, I finally had a chance to play in a brand-new challenge at Splitcoast Stampers, the Mix-Ability Challenge.  This one is so much fun!  It challenges us to use mixed media in projects, but even better, it teaches us how to use mixed media in projects.  Lydia even created a fantastic video for the challenge, which you can see HERE.

This week's challenge is "Yin Yang".  We're asked to use something matte and something shiny on our cards.  Since Lydia's video showed how to use gesso and I've been wanting to try gesso on a card, I used that medium to create a matte background for my heart.  I have two "shiny" things on my card, one subtle and one not-so-subtle.  I used heat embossing on my heart and I created a "raindrop" background using crinkled paper, Versamark and Glassy Glaze.  

Here's my card:


Here's a close-up of the heart:


And hopefully you can see the shiny background a bit better here:
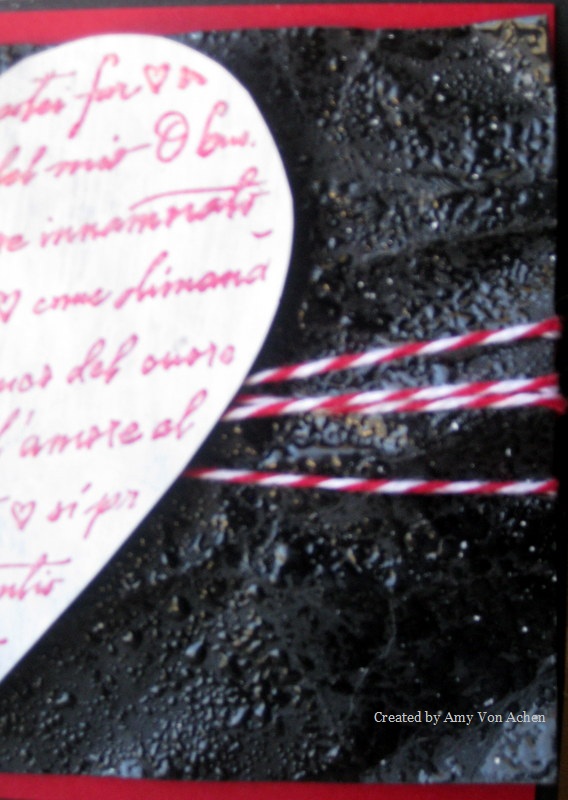

I started by applying gesso to a piece of patterned paper that was black with white hearts.  (I was hoping a bit of the pattern would show through, but I was a bit too heavy-handed with the gesso.)  I used a heat gun to dry the panel because I'm too impatient to watch paint dry!  I stamped my image over the gesso with Rose Red craft ink and heat embossed it with clear embossing powder, then cut around the image to create the heart shape.  Because the patterned paper is very light-weight, I cut a smaller-sized heart from chipboard (so it wouldn't be noticeable) and adhered it to the back of the stamped heart to give it some stability on the card.

Next I got to work on my shiny panel.  I spritzed a piece of black card stock with water, then crumpled it.  Once it was nicely crumpled, I flattened it out a bit and ran my heat gun over it to be sure all the water had dried.  I rubbed Versamark all over it using the direct-to-paper method, then applied Glassy Glaze, which is like a chunky, shiny embossing powder.  I heat set the Glassy Glaze to create a shiny, wet look that reminds me of raindrops. 

I wrapped red and white baker's twine around the black piece.  I adhered the black piece to a panel of red card stock, then adhered the red piece to a black card base that was cut to 4" x 5 1/2" (slightly smaller than an A2 card). I attached the heart to the shiny black panel using thick foam dimensionals and placed Zots on top of the dimensionals to really help the heart stick to the black panel.

I had so much fun playing with new tools for this card!  I have really enjoyed making different styles of valentines over the past couple of weeks, especially since I can use my favorite color combo (black, white and red) so easily at this time of year!  If you want to learn how to use new mediums and explore your creativity a bit, too, I hope you'll give the new Mix-Ability Challenge a try!  

Thanks for stopping by today!

Products Used:
Stamp: Amore HeartPrint (Hero Arts)
Ink: Rose Red Craft Ink (Stampin' Up!). Versamark (Tsukineko)
Paper: B&W Doodle Hearts (The Paper Studio); red and black card stock (unknown)
Tools and Accessories: Gesso (O'Leary Paint); clear embossing powder (Mrs. O'Leary's); Glassy Glaze (Stampin' Up!); baker's twine (Strands, Etc.); 3D Foam Squares and Zots (Therm-O-Web); chipboard


Tuesday, September 25, 2012

You Warm My Heart with Polka Dots

This week's Clean and Simple (CAS) Challenge at Splitcoast Stampers was a sketch challenge (they provide a sketch and we use it for the card's design).  The Try a New Technique Challenge (also at Splitcoast Stampers) required us to use polka dots somewhere on our cards.  I combined both challenges in this card:

 
The stamps are from a Close to My Heart clear stamp set.  While I normally prefer rubber stamps, I absolutely love CTMH clear stamps.  They stamp quite well with a variety of inks and I think they make a very clean impression.  I bought this set because of the coffee images in it (the coffee cup in my previous post is from this set), but I thought these mittens and the tiny snowflake were adorable.  I hadn't even noticed the polka dot stamp in this set until tonight, and it worked perfectly for adding the dots required by the challenge!  I love stamp sets that have multiple uses.

The images are stamped on white card stock using classic dye inks from Stampin' Up! in Rose Red and Handsome Hunter.  (I don't think I will ever get those tiny snowflakes to stamp in a perfectly straight line!)  The white card stock is adhered to dark green card stock, and I used a thin piece of that same card stock to make the solid strip under the polka dots.  Because my larger piece of dark green card stock was not big enough for a card base, I trimmed it to fit as a card front and adhered it to a white card stock base.  The benefit of a white card stock base is that you won't need to put a liner inside your card for writing your message.

This card is quick and easy to make. Cards like this are perfect for making multiples at one time, and you can always vary the sentiment, colors or image if you didn't want duplicates. I like to keep extra cards on hand or add them to my box for Operation Write Home, so I try to make duplicates of "general" cards. (I don't tend to make duplicates of birthday cards for family and friends, as I try to make each birthday card specific to the person receiving it.)

One of the biggest difficulties I face in creating Clean and Simple cards is leaving all that white space!  The idea behind CAS is that you will have lots of open space and little (if any) layers or embellishments. I think CAS cards look deceptively simple sometimes.  If you make mistakes, they are easily seen on a CAS card. You can't just add an embellishment to cover them up!  I really love the clean look of a CAS card, especially with bold, vibrant colors.

That's all for today. Thanks for visiting!